Audience Menu
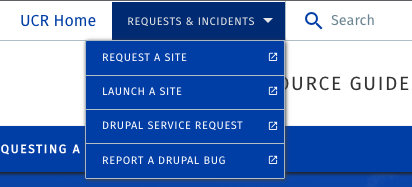
The Audience Menu is an optional menu that displays at the top left of your site, in the region called Header Top. Sometimes a separate menu from the main navigation is necessary. Examples of audience menu uses include listing all departments within the organization, linking to all request forms in an administrative site, or referencing any related programs or labs. These are just a few examples of how an audience menu can be utilized.
Keep in mind that where the Audience menu is placed has its limitations. On narrow screens or in tablet mode, if there are too many items in the Header Top region, items will start to wrap. For this reason, it is advised that only one, or two, if shortly named, main items be present, the rest being drop-down (sub-navigation) items. The example in the image has one main navigational item labeled "Requests & Incidents" and four sub-navigational items called "children" that display as drop downs.
How to Edit the Audience Menu
- In the admin panel, navigate to Structure > Menus.
- Locate UC Riverside - Audience Menu and click to view the current menu structure.
- Existing default menu items can be removed. Do not delete the menu itself.
- Click the +Add link to add a new link to your menu.
- On the Add menu link page:
- Menu link title - the text to be used for the link in this menu that will display in the menu bar.
- Link - Start typing the title of a piece of content to select it. You can also enter an internal path such as /node/ or an external URL such as http://example.com. Enter <front> to link to the front page.
If this item will be used only to be a main item that lists drop down items and has no link, please use "#" in the link field. And make sure "Show as expanded" is checked so it will function as a drop down. - Enabled - A flag for whether the link should be enabled in menus or hidden.
- Description - Shown when hovering over the menu link.
- Show as expanded - If selected and this menu link has children, the menu will allow for drop-downs. This should be checked if there are sub-navigation items (drop-downs) for this menu item!
- Parent link - If selected your link will be included below the link designated as its parent. The maximum depth for the audience menu should be two levels only: main and sub navigation.
- Weight - Ignore this as changing the weight can be done in the menu screen by dragging and dropping.
- When complete, scroll to the bottom of the screen and click the Save button.
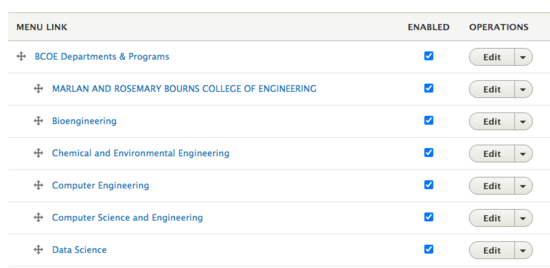
- If your items needs to be a sub-nav item, or a "child" of one, be sure to drag it as indented. Save when you make drag & drop changes.
In the process of creating your content or, as your site grows over time, you may find that your navigation links aren't displaying in the order you would prefer. Changing the order is a very simple process. You are able to change the order by holding down the mouse (active click) and pull the cross hair with arrows by dragging and dropping. After dragging the link to the new location, un-click. You'll see an alert message indicating you have unsaved changes. Click the Save button to save and continue.
Sub Navigation (drop-downs)
Submenu items are navigation options that will appear as drop-down items from your main navigation bar. This should be used on Audience Menus if you need to show more than one or two items in that menu. If a main navigation item has submenu items, then that main navigation item needs to either link to "#" or link to the first item in the drop down as well. The reason for this is that on mobile, you can not click on a main navigation item if it has children (submenu items), it will only open the drop down links.

