Deleting, Removing, and Replacing Files
Once a file (image or document) has been uploaded to your site and is part of your media library, you can view it in your media library as well as place it within content blocks either through the WYSIWYG editor or form fields that open the media library. When it comes to removing and deleting files, there a questions to ask yourself. Do you want to completely delete the file or do you want to remove an existing version of that file and replace it with an updated version?
Reasons to delete a file...
- Editors uploaded multiple of the same file. Example: There are now a handful of pdfs with "name.pdf", "name-0.pdf", "name-1.pdf" but they are essentially all copies of each other.
- A document or image was uploaded but it was decided it would not be used on the site after all.
Reasons to remove/replace a file...
- There is an updated version of the file that needs to replace the existing file (either image or document)
- Accidentally uploaded the wrong file but want to keep the alias given to the file
Deleting a File
To delete a document or image is to completely remove it from your site. If this file was linked or placed on one of your pages, once it is deleted, the link will no longer work and offer the 404 error page to the visitor and deleted images will no longer display on the pages. If a file was never linked or placed on a page then deleting a file will be straight forward.
- Navigate to Content -> Media
- Switch to Table view
- Find the file you wish to delete (you can filter for the file)
- Click on the drop down arrow next to edit and select "delete".
- Confirm deletion.
- The file will be removed from the Media Library. In the Files tab, you will see that the file is now listed as "temporary" and found in zero places. The system will clear temporary files every 6 hours.
Note: There are several ways to delete a file and you can continue to stay in Grid view. In Grid view, you'll need to click into the file and you'll see a red delete link at the bottom.
Removing (replace) an Image
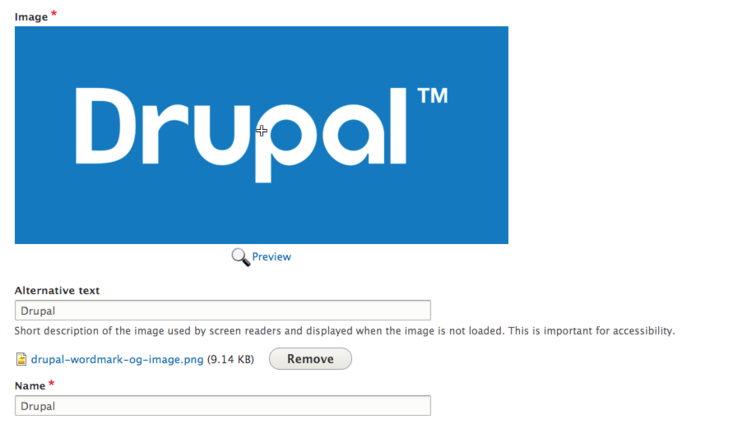
To remove a file is more akin to replacing with an updated, or the correct, version of the file. If an image was placed on a page with the "star" icon or using a custom block and it is removed (updated) rather than deleted, it will automatically be updated in those places.
- Navigate to Content -> Media
- Click on the file name of the item in Grid view or the Edit button in Table view
- Click on the Remove button
- Choose a new file from your computer
- Notice that the name and URL alias does not change
- Click Save
Replace Document
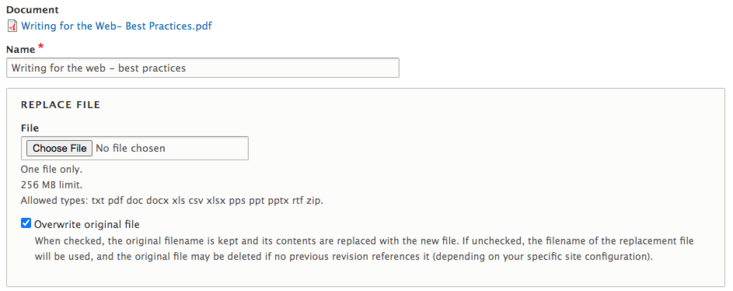
A new module is available that allows editors to overwrite existing documents. Before, uploading a new document meant a completely new URL unless you used the document's node URL, otherwise known as the URL alias (the media file with that path of /document/name-of-file). Now, when replacing a document, there is an option to "overwrite" the existing file which will keep its existing path!
- Navigate to Content -> Media
- Click on the file name of the item you want to replace in Grid view or the Edit button in Table view
- In the "Replace File" section, click on "Choose File" to browse your computer for the file to replace the existing one.
- Make sure "Overwrite original file" is checked if you want to keep the filename the same. This is important if you do not want to update all the links throughout your site or if you have given the original link to individuals through email.
- Click "Save" to update.


