Media Files
What is "Media" in Drupal?
Media refers to any image, document, or video. Images and documents can be uploaded to Drupal. Images can be displayed in various ways on your site. Documents can be linked to and downloaded and viewed by visitors. Streaming videos, such as videos on Youtube, can be referenced. All these media files are located in what is called the "Media Library".
Currently, the media file types that can be uploaded are as follows:
- Images: png gif jpg jpeg
- Documents: txt pdf doc docx xls csv xlsx pps ppt pptx rtf zip
- Video: streamed videos on Youtube and Vimeo can be referenced but no video files can be uploaded
Adding Media
The following instructions will show you how to upload media (or make a reference to in the case of a video) to the Media Library.
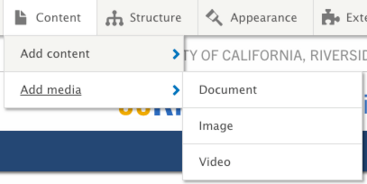
Hover over Content -> Add media and select either Image, Document, or Video
Document
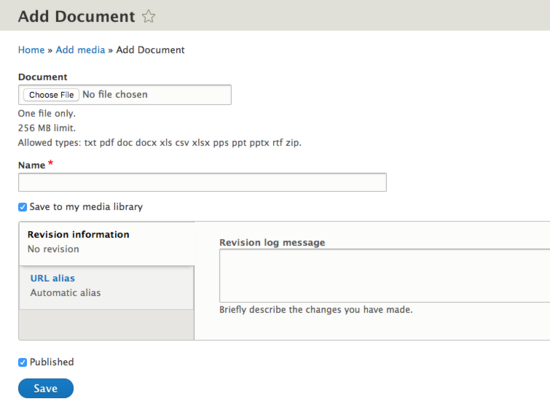
For a document, click on "Choose File" which will open a browsing window on your computer. Be sure to abide by the MB limit and allowed file types.
The "Name" is a required field. This is the name that editors will search for when creating a link to this document on a page. Keep "Save to my media library" checked on, or else it will not be stored in the library. Make sure "Published" is checked if you want site visitors to access the document.
Images
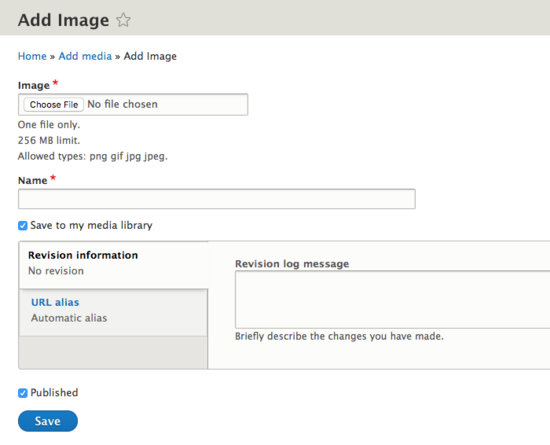
For a document, click on "Choose File" which will open a browsing window on your computer. Be sure to abide by the MB limit and allowed file types.
The "Name" is a required field. This is the name that editors will search for when adding an image on a page or block. Keep "Save to my media library" checked on, or else it will not be stored in the library. Make sure "Published" is checked if you want site visitors to see the image.
Setting Focal Point
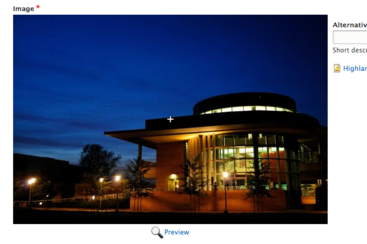
Once the image has been selected, you will see a crosshair in the middle of the image. This is the Focal Point. This tells Drupal that a specific part of the image is most important. When you use an image style within Drupal to scale and crop the image, Drupal will know to crop into that focal point. There can only be one focal point per image and focal point can be updated later.
To move the focal point, click on the crosshair and hold down the button, dragging it to where you want the crosshair to set the focal point.
Add Media via the WYSIWYG Editor
To add media to a page or custom block that provides the edit toolbar, you will use the "Star" icon.
- Place your cursor where you want to insert your image on the page within the editable space. Click on the "Star".
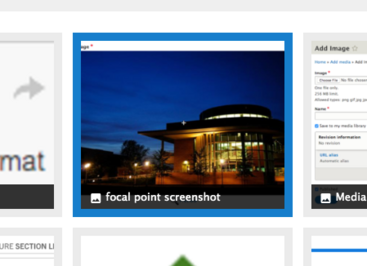
- The Media Library will open. Images will show a mountain icon. Select the image you want by clicking on it, a blue bounding box will display around the chosen image.
Note that not all images may show and you may need to "Load More" - When the correct image is selected, click on "Place".
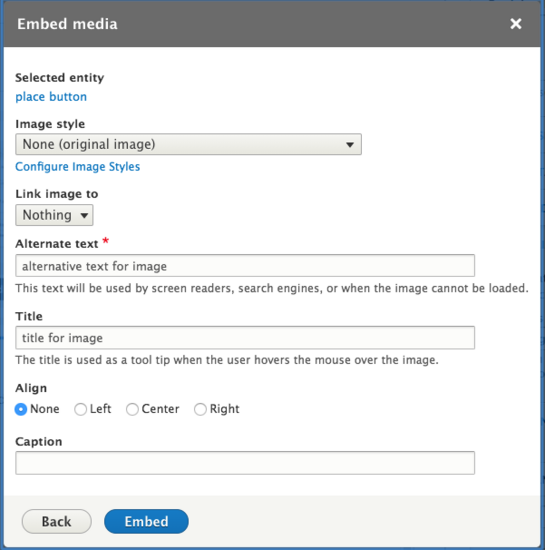
- A popup for the Media Embed will display.
a. Select the Image style. Some images styles size and crop, WYSIWYG scale styles will only scale.
b. Alternate text and title will already display if they were filled out when uploaded. Alternate text is required for accessibility.
c. Optionally change the alignment. Selecting either "Left" or "Right" will wrap text around the image, so that the image will float left or right of that text.
d. Optionally add a caption. That caption will display below the image with a blue line underneath. - Click "Embed"
Add Media to Specific Fields
Some custom blocks have special fields for adding an image or document. In this case, you will not see the "Star" icon, instead, there will be a button or link to click on that will open up the Media Library. If you have not already uploaded your image, documents, or referenced your video, don't worry, there will be a tab to upload or embed. These special fields will not allow you to select an image style, as they are already predefined containers. To set an image, you can still follow the instructions steps 2 and 3 above.
Un-publishing (Archiving) Media
In the media tab, find the file, click on "Edit". Scroll down and you will see the "Published" option, un-check that. Once you save, you should be able to view it when logged in but if you go to the URL alias or the document URL, without being logged in, then you should get a 404 error.
