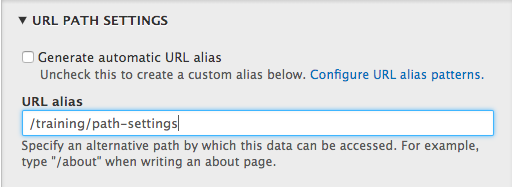
URL Path Settings
What is a URL Path?
The URL path is the path a browser will follow in your site's domain hierarchy to find a specific piece of content.
Default URL Path Creation by Drupal
By default, Drupal is configured to generate a URL for your page when you create it and will place the link at the root of your domain name (i.e.: https://websites.ucr.edu/my-new-page). This URL is based off the information you provide in the content type's Title field. For this particular page, by default, it would take the form "url-path-settings", if another path setting was not specified.
Why use URL Path Settings?
Using this setting allows you to do two things:
- Accurately reflect this page's relationship to other content in your site.
Example: A user creates a new basic page and then the system auto-generates a URL Path of:
https://sitename.ucr.edu/url-path-settings (or, when authenticated, https://live-ucr-sitename.pantheonsite.io/ucr-path-settings).
In reality, this page should be https://sitename.ucr.edu/training/path-settings
The second will visually reflect its position in the site as a piece of content that lives under Training - Updating your URL Path Settings will also update the page's breadcrumb trail, which improves your visitors' browser experience as it allows them to navigate to parent content with ease.
Create your own URL Pathway
- In the page whose URL pathway you want to change, look to the right side, there is an Additional Options panel.
- Click on the URL Path Settings section to expand it.
- Uncheck the Generate automatic URL alias box.
- The URL alias field will un-gray, allowing you to type in your own URL. Make sure to begin the URL with a backslash (/) and separate words with a hyphen (-). Do not use spaces and it is best to use all lowercase letters.
Example
Original: /url-path-settings
Updated: /training/path-settings or /path-settings (if not under a specific section) - Scroll to the bottom of the screen and click Save to finish.
