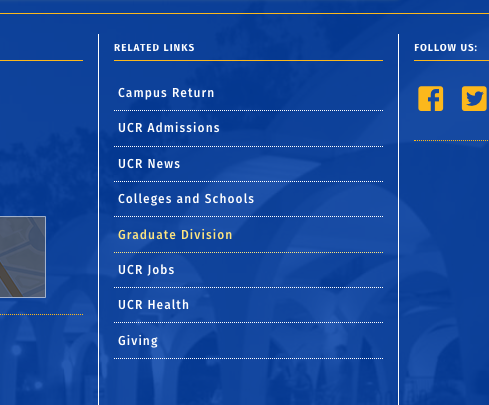
Related Links Menu
The Related Links is an optional menu that displays in one of the footer regions of your site. These can be used links that wouldn't necessarily go in your main navigation. Examples of audience menu uses include listing all departments within the organization, referencing other related research projects, similar labs, or other higher education websites with similar programs.

Keep in mind that where the Related Links menu is placed has its limitations. These related links function best as main navigation items, therefore sub-navigation, or "child" items, should not be used. This means, they should all be one level. They will not display as drop-down links even if its positioned intended underneath another item.
How to Edit the Related Links Menu
- In the admin panel, navigate to Structure > Menus.
- Locate UC Riverside - Related Links and click to view the current menu structure.
- Existing default menu items can be removed. Do not delete the menu itself.
- Click the +Add link to add a new link to your menu.
- On the Add menu link page:
- Menu link title - the text to be used for the link in this menu that will display in the menu bar.
- Link - Start typing the title of a piece of content to select it. You can also enter an internal path such as /node/ or an external URL such as http://example.com. Enter <front> to link to the front page.
- Enabled - A flag for whether the link should be enabled in menus or hidden.
- Description - Shown when hovering over the menu link.
- Show as expanded - If selected and this menu link has children, the menu will allow for drop-downs. This should be checked if there are sub-navigation items (drop-downs) for this menu item!
- Parent link - If selected your link will be included below the link designated as its parent. The maximum depth for the audience menu should be two levels only: main and sub navigation.
- Weight - Ignore this as changing the weight can be done in the menu screen by dragging and dropping.
- When complete, scroll to the bottom of the screen and click the Save button.
In the process of creating your content or, as your site grows over time, you may find that your navigation links aren't displaying in the order you would prefer. Changing the order is a very simple process. You are able to change the order by holding down the mouse (active click) and pull the cross hair with arrows by dragging and dropping. After dragging the link to the new location, un-click. You'll see an alert message indicating you have unsaved changes. Click the Save button to save and continue.