Webforms
All About the Webform Module
Many websites contain forms, whether it is a simple feedback form or to handle registration and submissions.
How to make a webform
- Go to Structure > Webforms > click on + Add webform
- Give it a title. Description and Category is optional. Make sure Status is Open
- Click Save
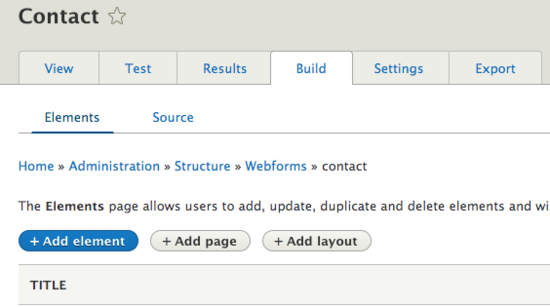
- After the page reloads, you’ll be taken to your new Form’s build page.
+ Add page - allows you to add another page to your form;
+ Add layout – adds a flexbox layout
but what we’re really concerned about is + Add elements - Click on + Add element. You’ll be shown a list of available form fields.
Some useful fields are:
Name
Email
Text Field
Text Area
Look for your desired form element and click Add element - Once the page finishes loading, a new window pane will appear on the right side of your screen for the element settings.
Give your element a Title. This will be the label that appears on the form.
IMPORTANT: Keep your form labels short and simple but descriptive. This will come handy when you set up emails.
Setup your form field however you want (check required fields if they are)
When your done setting up the fields, click on save. - When satisfied with your form, click Save elements.
- Click on the View tab to view your webform
- The submit button is added by default
Setting up emails
- Go to Structure > Webforms > Your webform > Settings > Emails/Handlers
- Click on +Add email
- On the right side of your screen, there should be a new Configurations window for setting up your email.
Give it a title
Depending on the context of this email (Notification, Confirmation, etc), you can tweak who the recipients are for this email.
By default, [site:mail] will be selected. This is the email you used when you setup your Drupal site.
to send it to a specific person, click on the to email dropdown and select Custom To email address…
a new text field should appear and you can fill that with a custom email address.
You can do something similar with the Send From and the Message sections.
To use submitted form fields for a more personalized touch, use the following syntax:
[webform_submission:values:<FIELD_KEY>]
Replace <FIELD_KEY> with the keys of your fields. This is why it’s important to keep your form labels short.
A sample personalized email:
Hi Kevin,
A question from [webform_submission:values:name] was submitted to you.
Their question was:
[webform_submission:values:question]You can contact him on the following
[webform_submission:values:email]
[webform_submission:values:tel_number]
thanks,
Sample UCR
Email Handlers
1. Navigate to Structure -> Webforms
2. Click on "Build" for Request a Report (that's the form to be updated)
3. Click the Settings tab and choose "Emails/Handlers" in the sub tab
4. Click Edit for the Email Confirmation
5. In the pop out box, scroll to the "send to" area and update the to "to email" section, where you can remove any emails (or add emails)
6. Scroll and click "Save"
MISCELLANEOUS
How to add conditions (conditional mails and fields)
- Go to Structure > Webforms > your Webform > Build > click on +Add element
- Go to Conditions
- Under Conditional Logic, setup your desired conditions with the given options
- Click Save
- Click Save elements
How to configure reCAPTCHA
- Go to Configuration > People > CAPTCHA module settings > reCAPTCHA
- Enter your SITE and Secret keys. If you don’t have this, click on register for reCAPTCHA. This will redirect you to Google’s dashboard for configuring reCaptcha. Please use the reCAPTCHA v2 under reCAPTCHA type. The Drupal reCAPTCHA module is only configured up to v2.
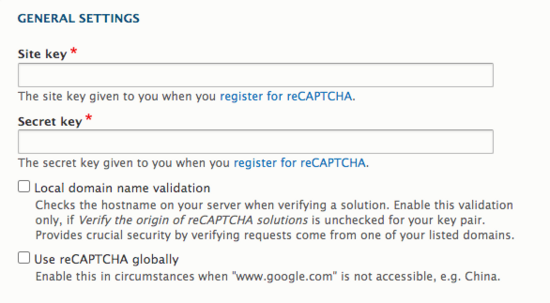
register for recaptcha and add keys - Click Save configuration
How to add a reCAPTCHA field to webform
If recaptcha is enabled on your site, you can add a recaptcha field like you would add any other field on the form:
- Hover over Structure > Webforms > and click Forms.
- Navigate to the webform that you want to add recaptcha and click on Build.
- Click on +Add element in the Build tab.
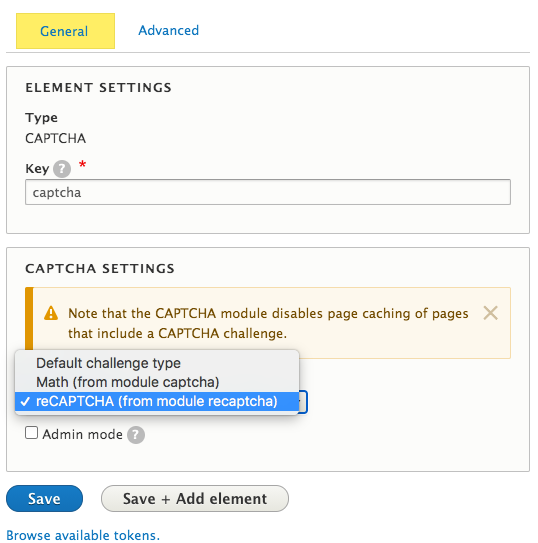
- Search for CAPTCHA and click Add element.
- On the window that appears on the right side of your screen, leave Element Settings alone, under CAPTCHA Settings change Challenge type to reCAPTCHA (from module recaptcha).
- Click Save
- You should now see the captcha element added.
You won’t be able to see the reCAPTCHA field when you're in admin mode.
Important: ReCAPTCHA and other similar technologies do not guarantee blocking 100% of bot submissions. Bots usually attack by submitting forms in large batches.
How to change the text on the submit button
- Go to Structure > Webforms > Your webform > Build > click on the Customize button for Submit button(s)
- On the window that comes up on the right side of your screen, go to Submit button label and enter in your desired button label. Click Save.
How to setup a customized confirmation screen
- Go to Structure > Webforms > your Webform > Settings > Confirmation
- The most popular option is to display a custom page so under Confirmation Type, select URL(redirects to a custom path or URL)
- Under Confirmation URL( /confirmation will do ), enter in your confirmation page. This can be a simple basic page that just notifies the submitter
- Click Save
How to download form results
- Go to Structure > Webforms > your Webform > Results > Download
- I would leave everything untouched but go down to Column Options
- Depending on what you want to see on the report, check any items you see fit. The form fields you’ve added will be at the end.
You’ll want to include Completed as this will give you a timestamp of when this form was submitted - Click Save settings. So you won’t have to go through step 3 every time.
- Click on Download. You will then get a csv file (form_name.csv)
How to add a webform as a block through Layout
- In the Layout tab, after you have determined the section where the block will be, click on "Add Block". The panel on the right will open.
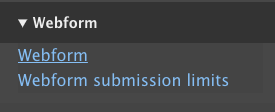
- Scroll to the "Webform" section or filter for "Webform". Select "Webform"
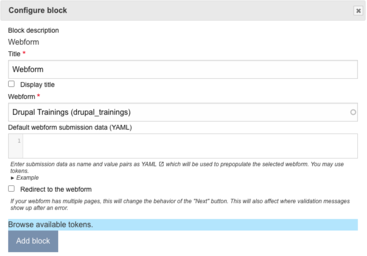
- Configure the block. You can change the title or uncheck the display title option. In the "Webform" field, start typing the name of the webform created, it will begin to auto populate. In the example, "Drupal Trainings" was used. Then click "Add block".
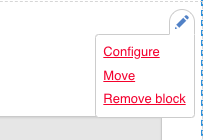
- Click on the pencil icon to configure, move, or remove the webform block.
Note: If you are having trouble updating a page in Layout, it may be due to the Webform. Always add your webform and make its configurations last. If you are editing an existing page with a webform you may get a notice that the page has not saved. When that happens, remove the webform block, save the page (you may have to do this twice) then go back to the Layout tab and add the webform block back.


